本文介绍如何在CentOS7.2上搭建Gitlab服务器,并简单介绍如何使用。
Preface
使用的是CentOS7.2的操作系统,安装当前最新版Gitlab服务器,下载地址:。
gitlab-ce-12.0.2-ce.0.el7.x86_64.rpm 610.5 MiB 2019-06-27 05:58
下载软件包。
# cat /etc/redhat-release CentOS Linux release 7.2.1511 (Core) # git --versiongit version 1.8.3.1# wget https://mirrors.tuna.tsinghua.edu.cn/gitlab-ce/yum/el7/gitlab-ce-12.0.2-ce.0.el7.x86_64.rpm# lsgitlab-ce-12.0.2-ce.0.el7.x86_64.rpm
安装依赖
gitlab依赖policycoreutils-python,需要先安装相关依赖。
# yum install -y policycoreutils-python
安装Gitlab服务器
使用rpm -i 可直接安装相关软件包。
# rpm -i gitlab-ce-12.0.2-ce.0.el7.x86_64.rpm
warning: gitlab-ce-12.0.2-ce.0.el7.x86_64.rpm: Header V4 RSA/SHA1 Signature, key ID f27eab47: NOKEYIt looks like GitLab has not been configured yet; skipping the upgrade script. *. *. *** *** ***** ***** .****** ******* ******** ******** ,,,,,,,,,***********,,,,,,,,, ,,,,,,,,,,,*********,,,,,,,,,,, .,,,,,,,,,,,*******,,,,,,,,,,,, ,,,,,,,,,*****,,,,,,,,,. ,,,,,,,****,,,,,, .,,,***,,,, ,*,. _______ __ __ __ / ____(_) /_/ / ____ _/ /_ / / __/ / __/ / / __ `/ __ \ / /_/ / / /_/ /___/ /_/ / /_/ / \____/_/\__/_____/\__,_/_.___/ Thank you for installing GitLab!GitLab was unable to detect a valid hostname for your instance.Please configure a URL for your GitLab instance by setting `external_url`configuration in /etc/gitlab/gitlab.rb file.Then, you can start your GitLab instance by running the following command: sudo gitlab-ctl reconfigureFor a comprehensive list of configuration options please see the Omnibus GitLab readmehttps://gitlab.com/gitlab-org/omnibus-gitlab/blob/master/README.md
gitlab默认占用8080端口,因为我们这是临时测试使用,为了不被错杀,建议修改为其它非Web-like端口,如10101等其它端口。
修改端口
修改gitlab配置文件。
# vim /etc/gitlab/gitlab.rb...external_url 'http://xx.xx.xx.xx:10101' # ip:port的形式
重新配置
修改配置文件之后,需重新配置,执行如下命令。
# gitlab-ctl reconfigure...Running handlers:Running handlers completeChef Client finished, 30/712 resources updated in 50 secondsgitlab Reconfigured!
启动服务
配置完成之后,启动服务。
# gitlab-ctl restartok: run: alertmanager: (pid 3687) 0sok: run: gitaly: (pid 3697) 0sok: run: gitlab-monitor: (pid 3714) 0sok: run: gitlab-workhorse: (pid 3716) 1sok: run: grafana: (pid 3723) 0sok: run: logrotate: (pid 3742) 1sok: run: nginx: (pid 3750) 0sok: run: node-exporter: (pid 3756) 1sok: run: postgres-exporter: (pid 3765) 0sok: run: postgresql: (pid 3774) 1sok: run: prometheus: (pid 3777) 0sok: run: redis: (pid 3792) 0sok: run: redis-exporter: (pid 3816) 0sok: run: sidekiq: (pid 3904) 0sok: run: unicorn: (pid 3915) 0s
访问界面
访问刚才在配置文件中设置的http://xx.xx.xx.xx:10101
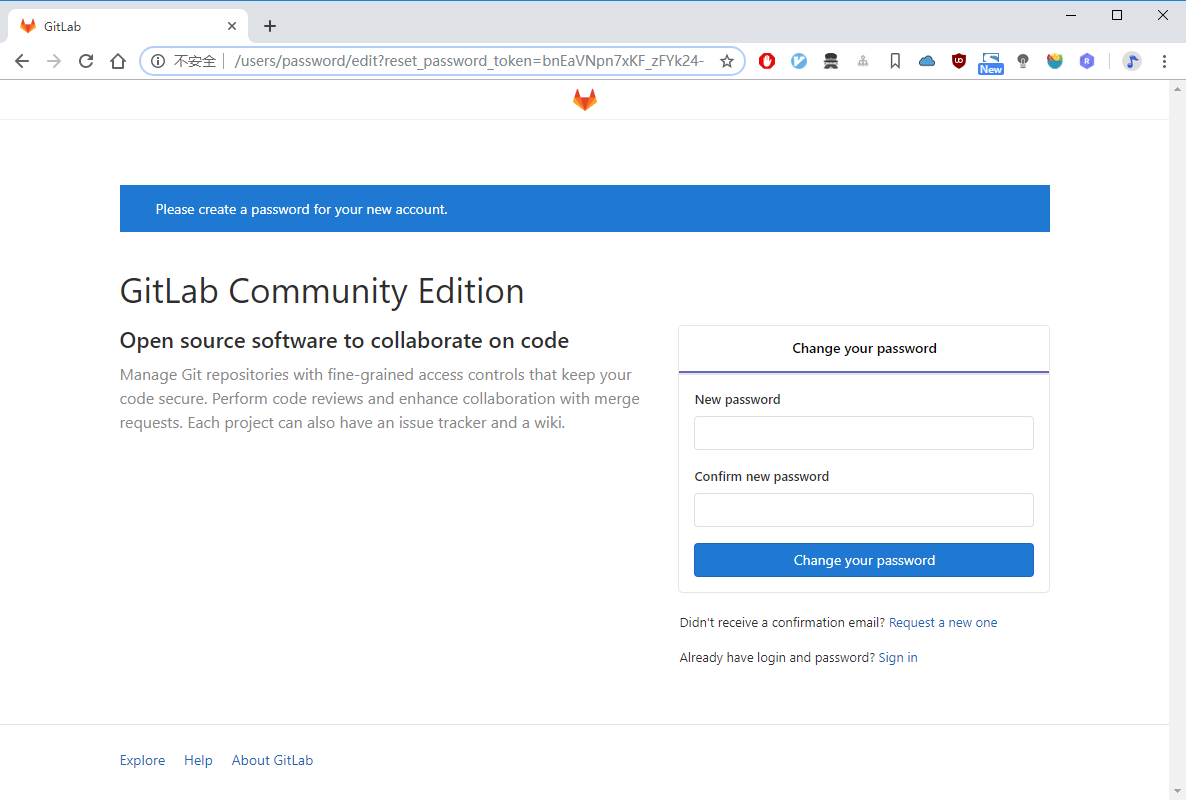
设置管理员密码
如下界面,设置管理员密码。
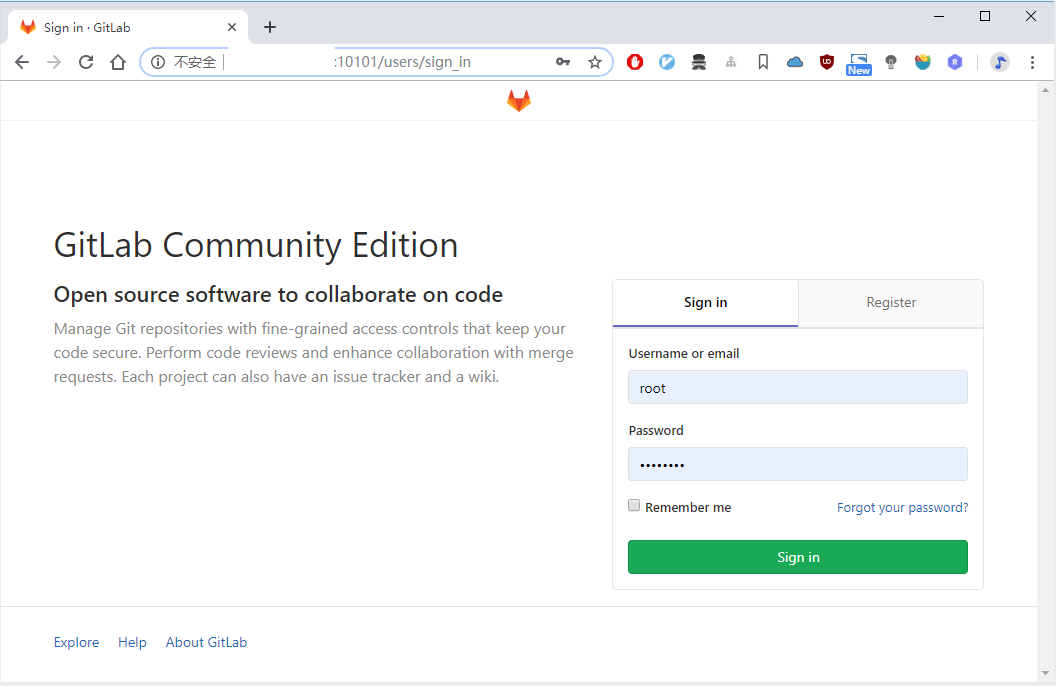
可以选择登录或注册,使用root和刚才设置的管理员口令进行登录。
目前空空如也。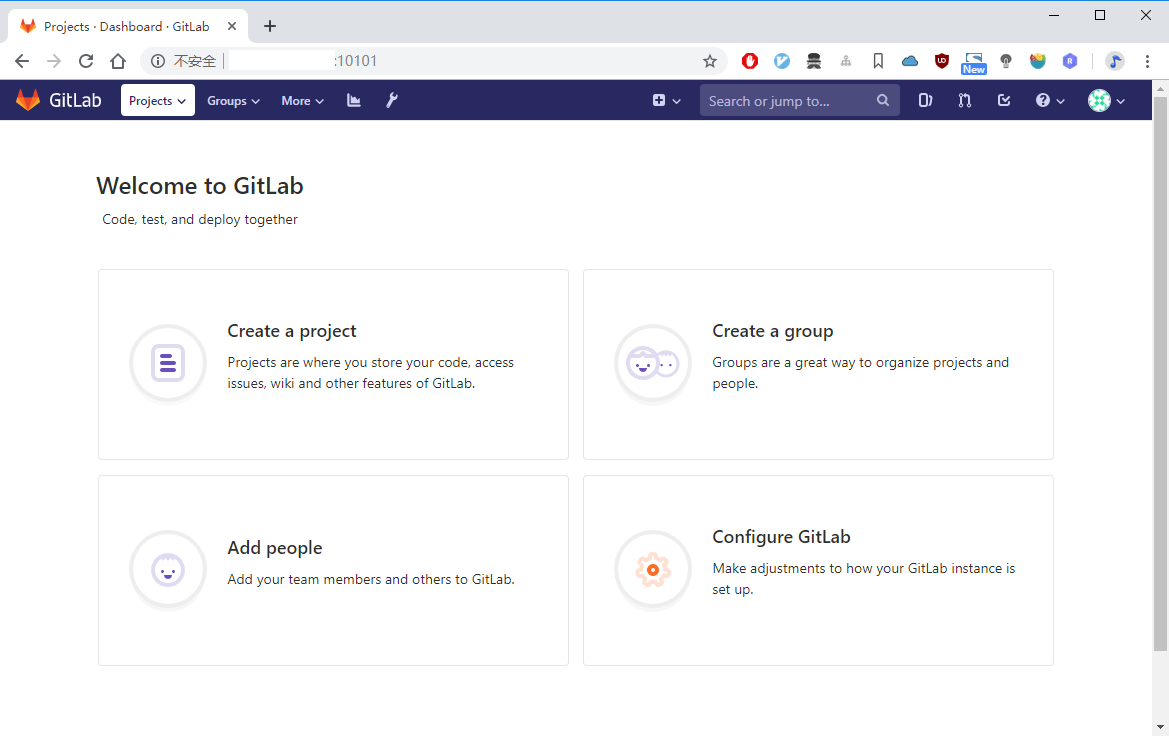
可以创建项目、组、添加用户和进行相关配置,这样Gitlab服务器便安装完成。